
Preparing the Ninja V for use with the Xbox Series X
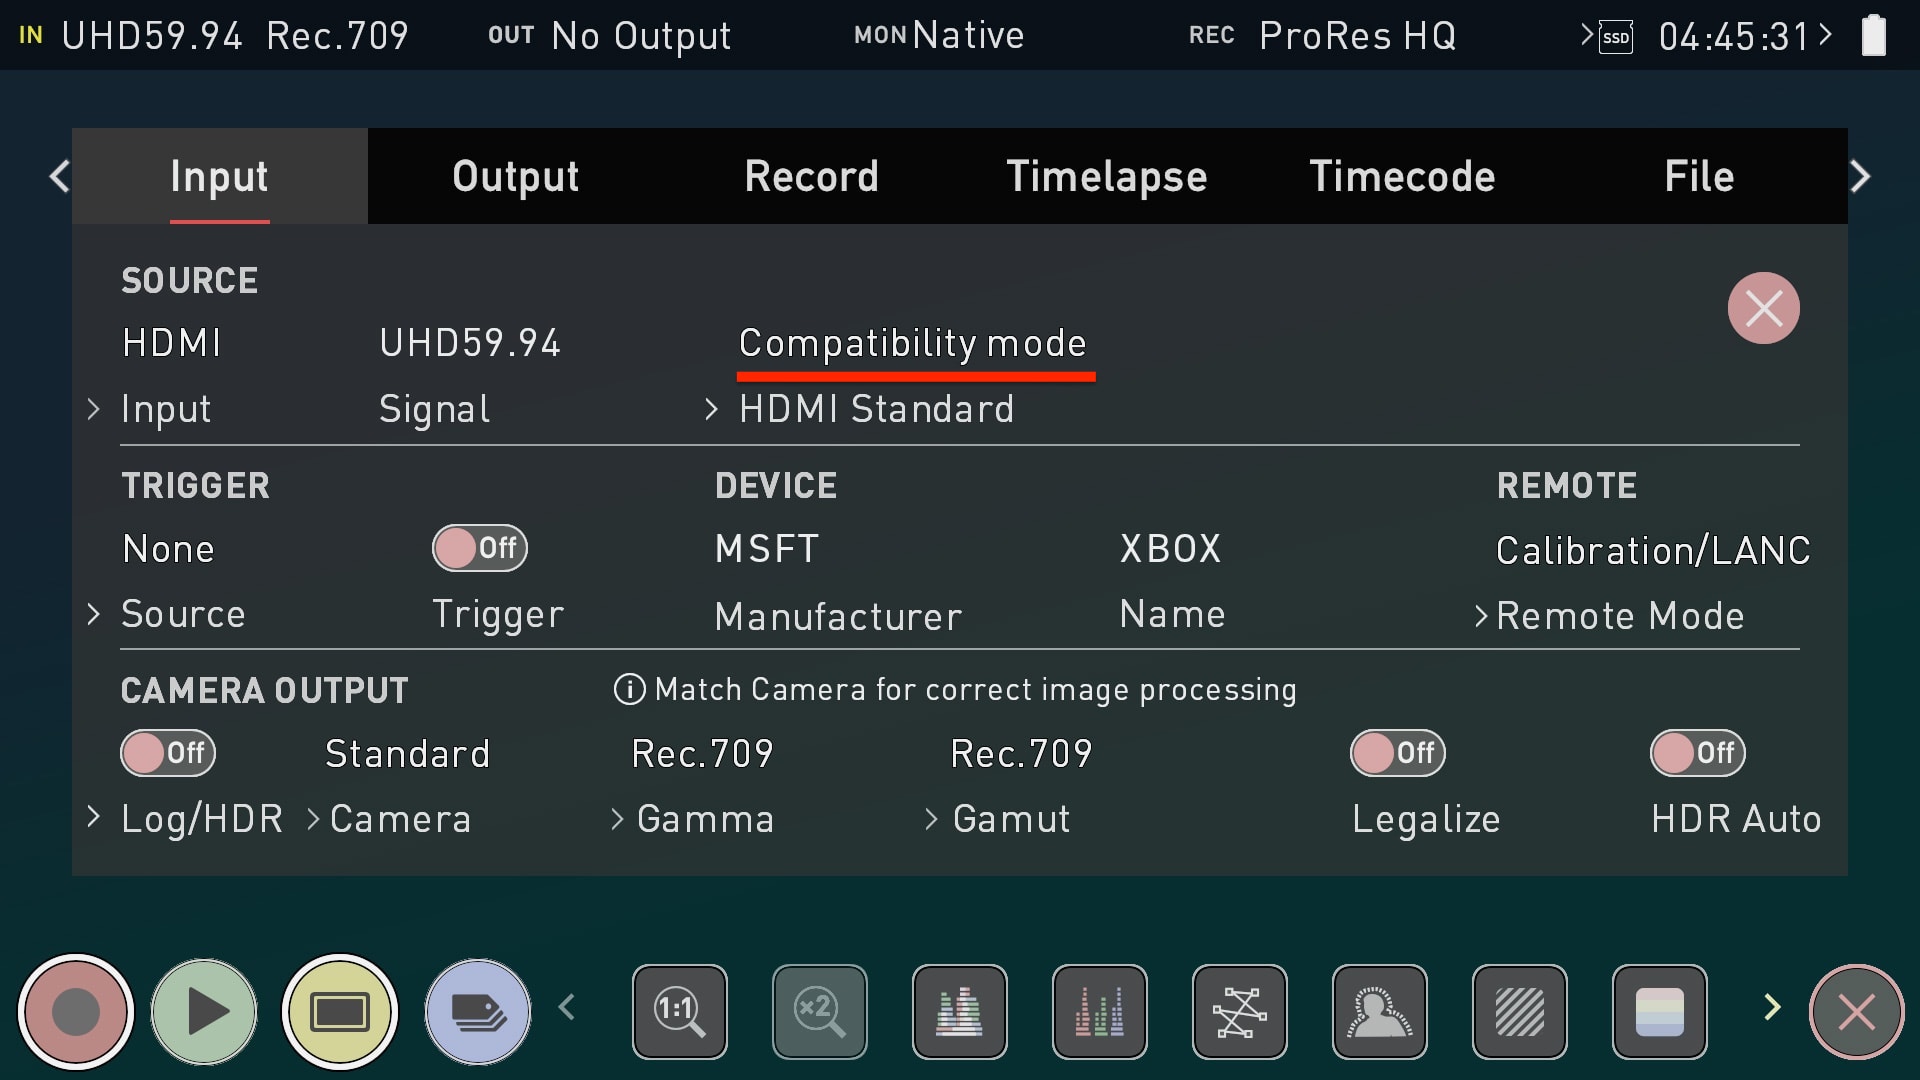
- Go into the Ninja V's Input Menu and ensure that the HDMI Standard is set to either 2.0 or Compatibility mode.
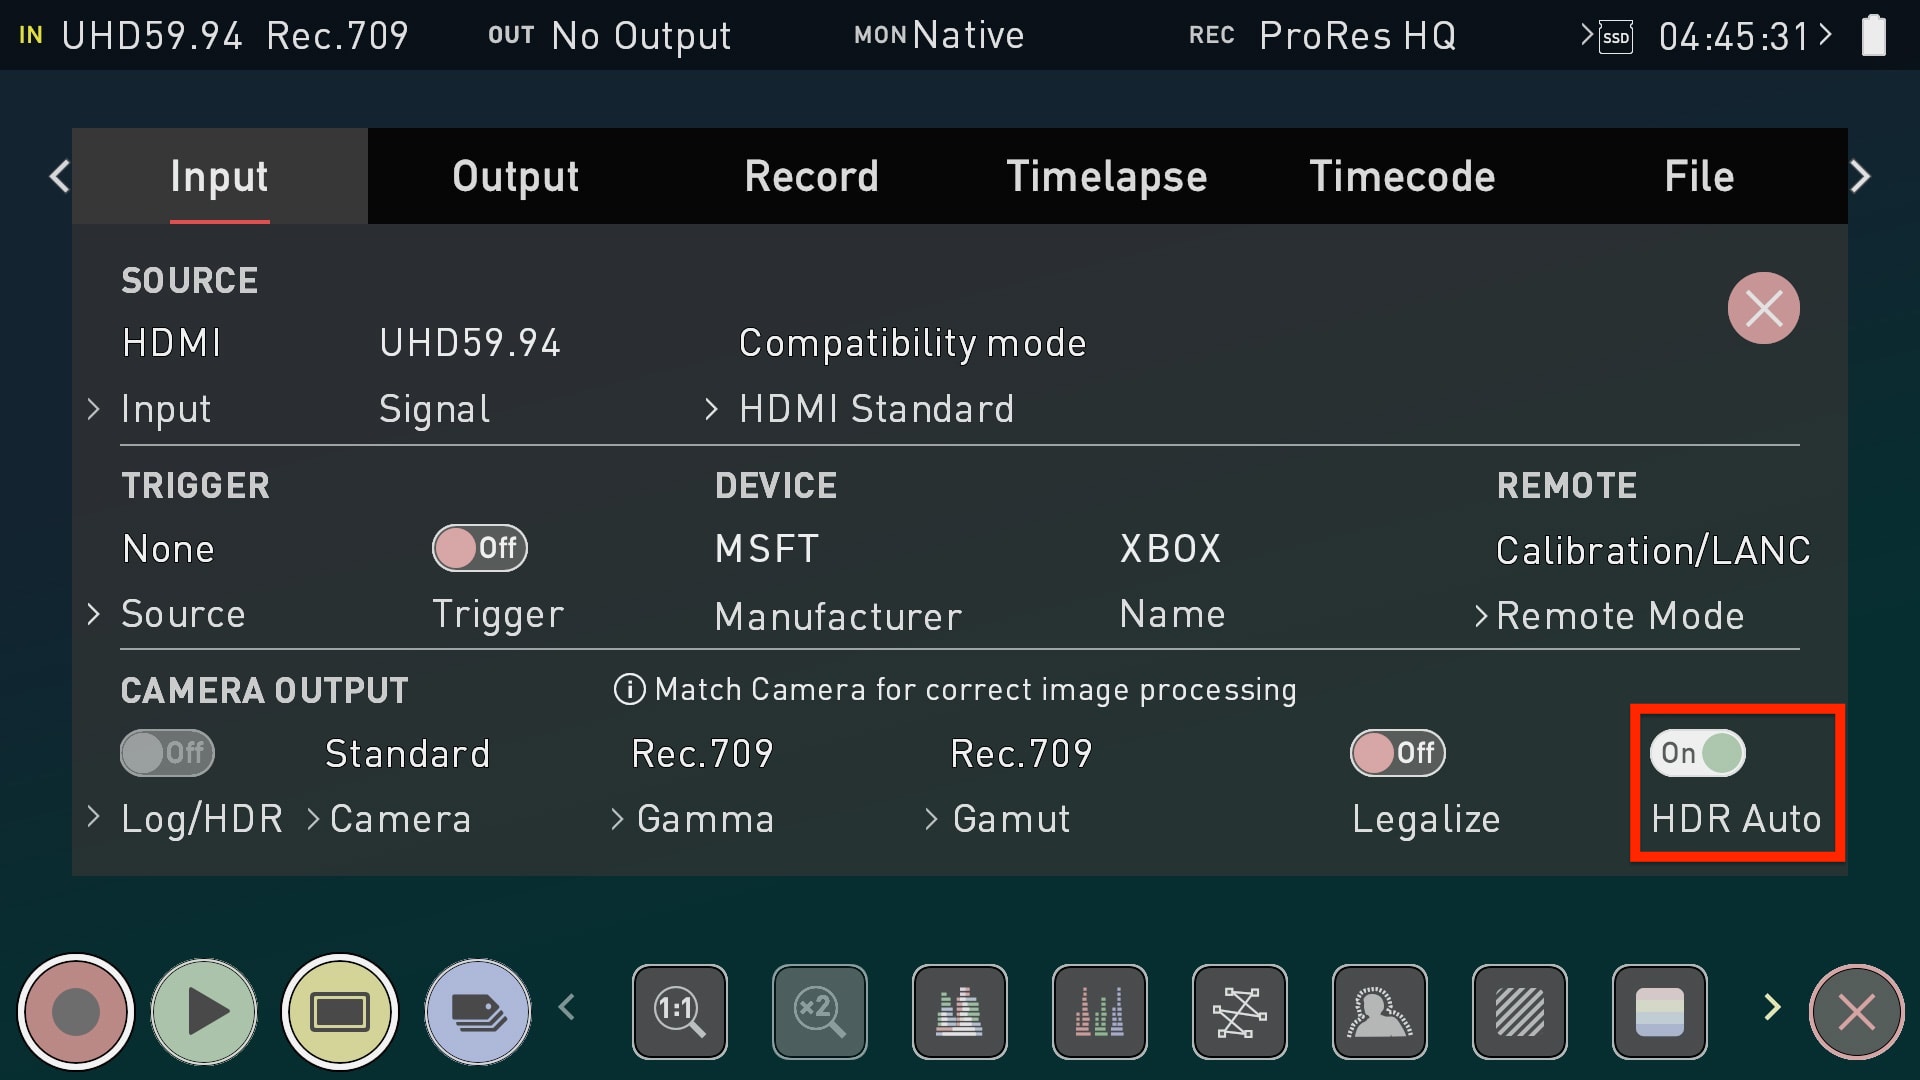
- Disable Log/HDR (if previously enabled) and set HDR Auto to On.
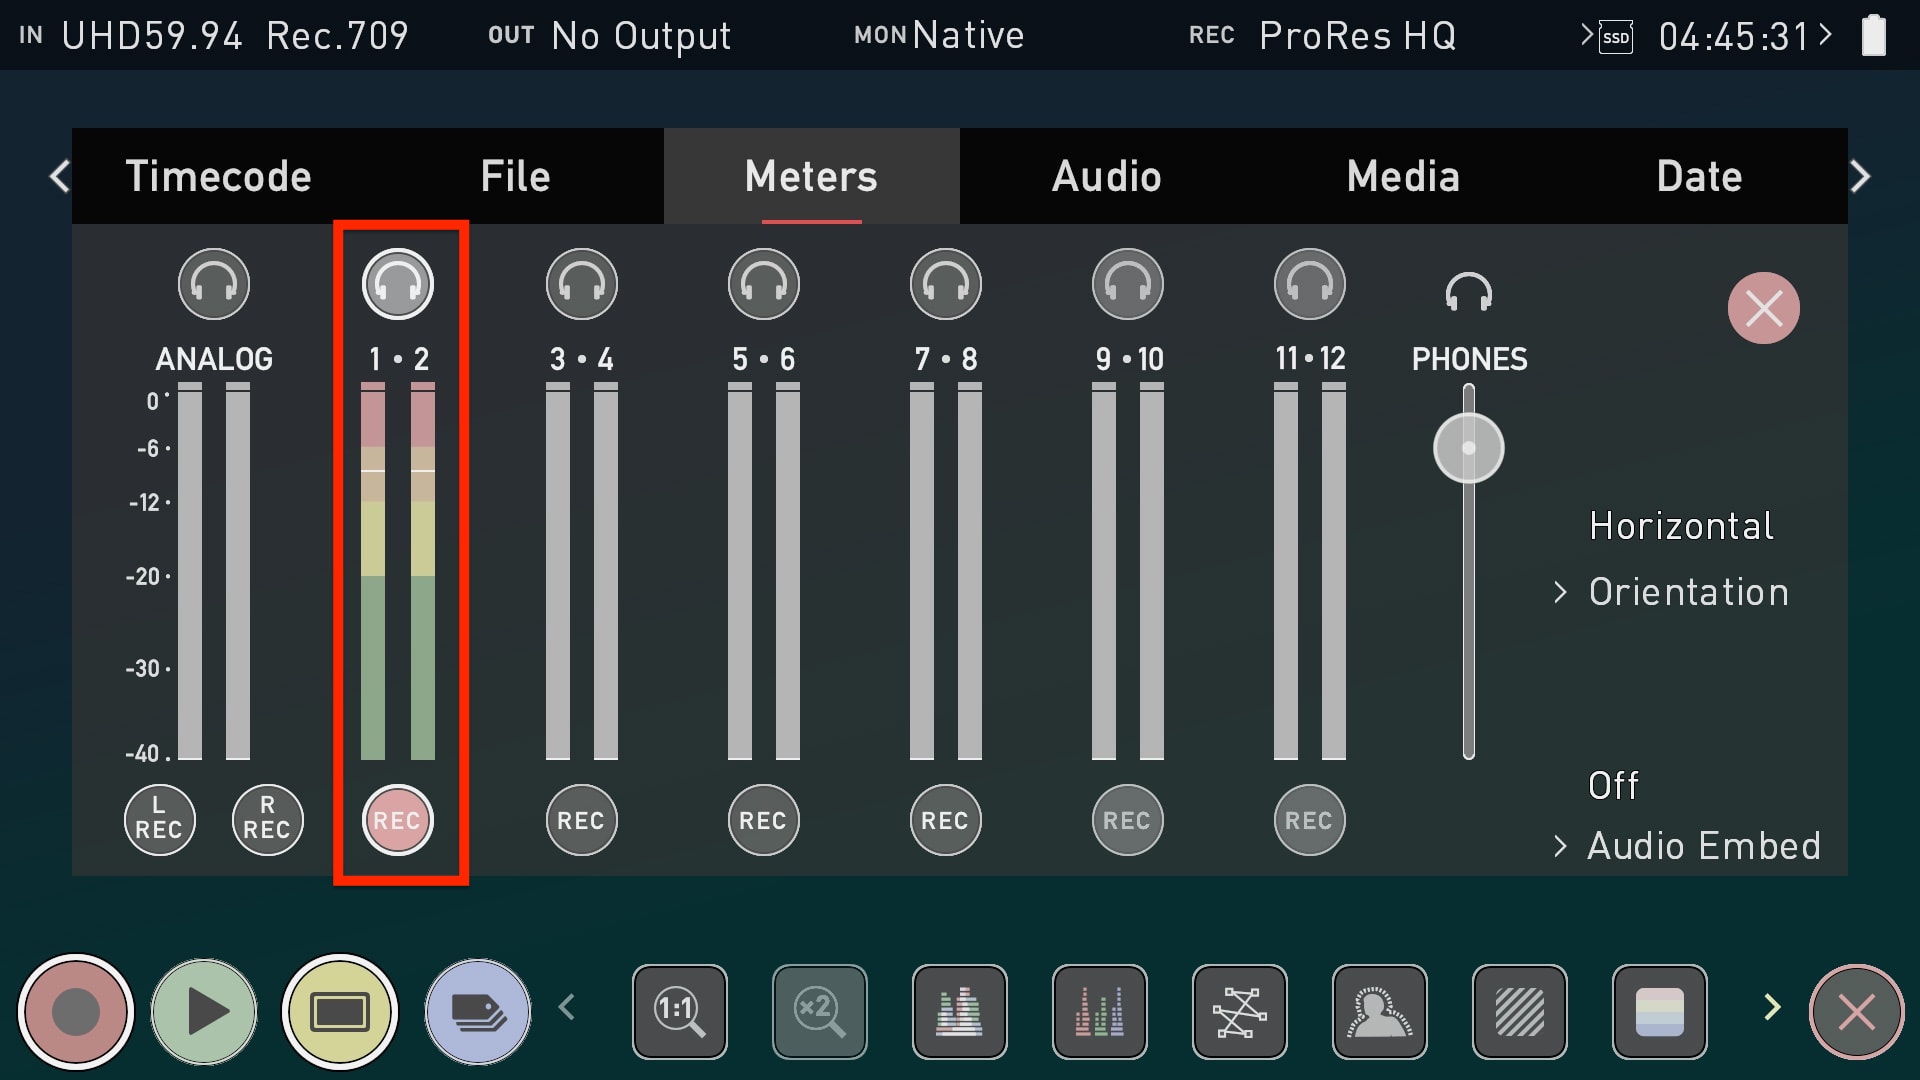
- We recommend recording stereo audio for ease of playback and editing support. For this, check the record indicator under Channel 1 & 2 in the Meters menu, and make sure Analog Audio recording is disabled.
Xbox Series X Settings
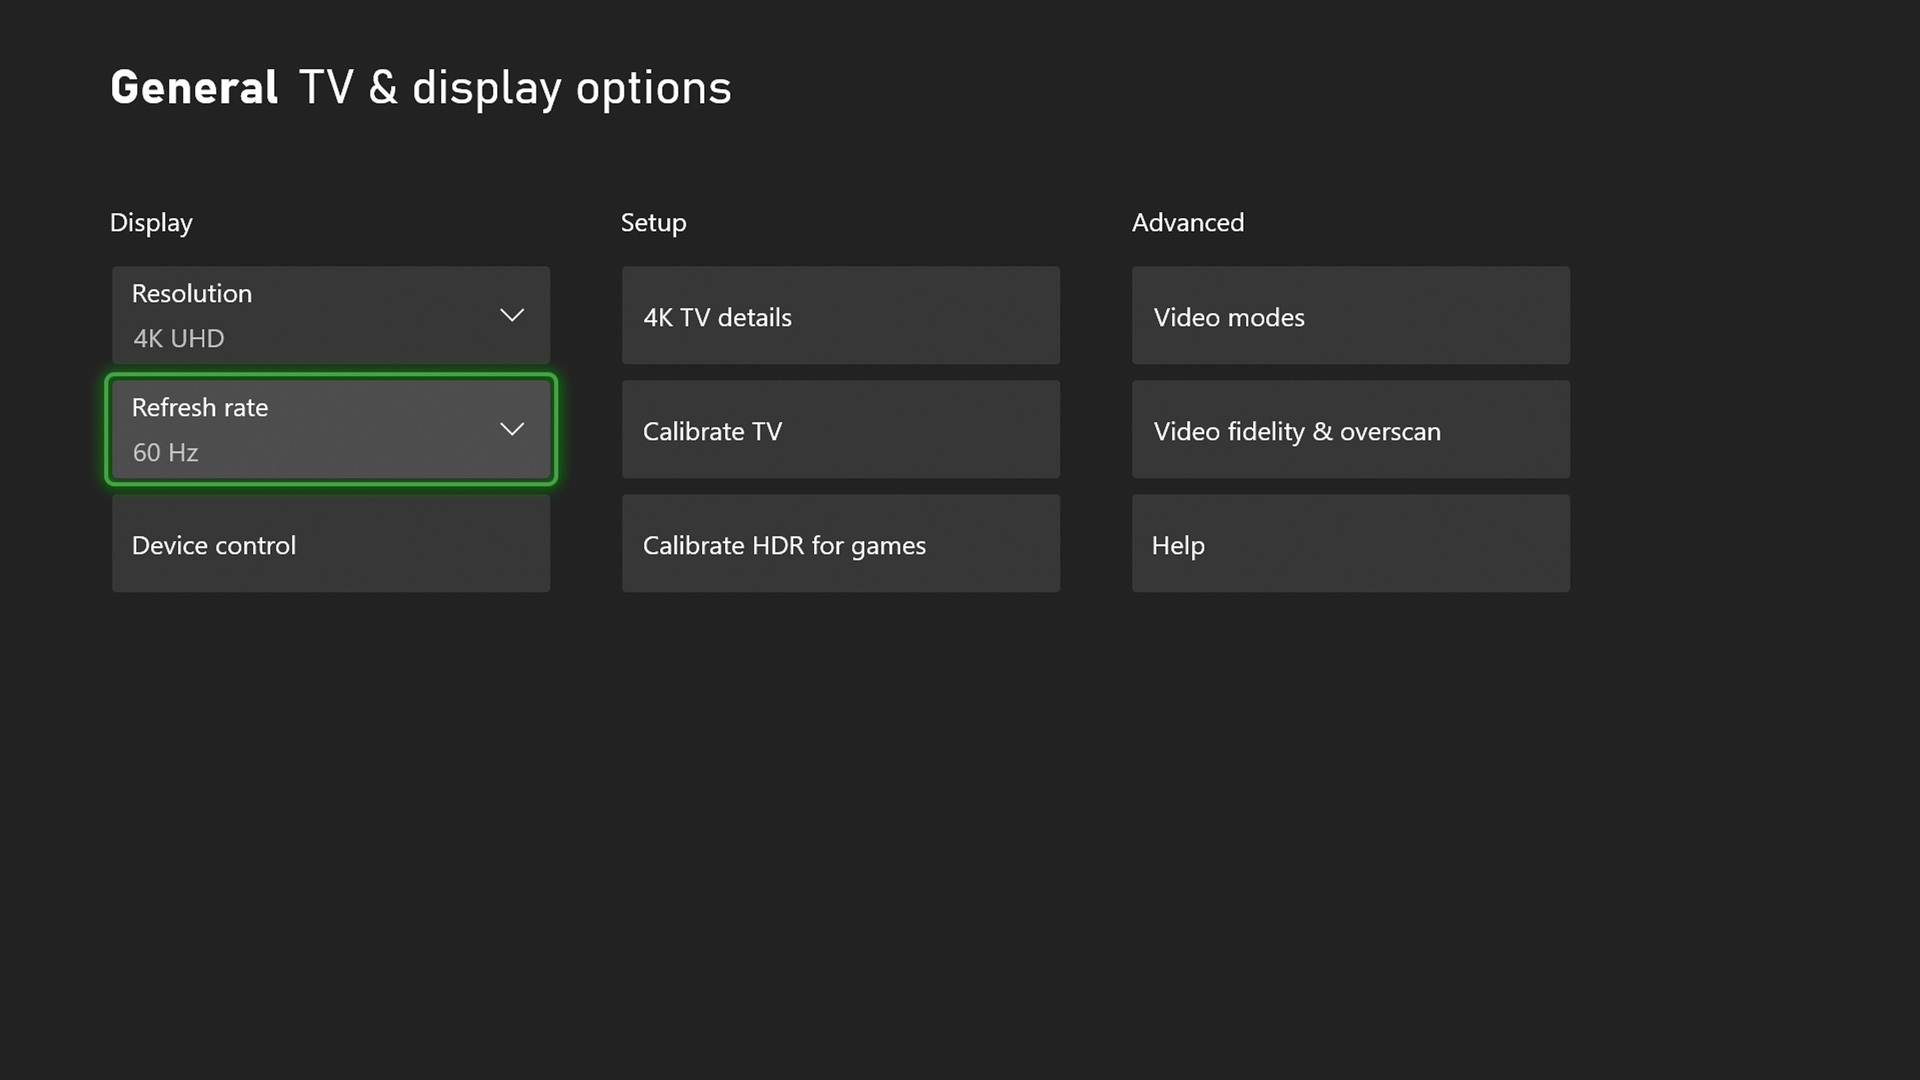
- In the TV & display options menu on the Xbox, verify that the Resolution says 4K UHD and the Refresh rate is set to 60Hz.
- Under Advanced>Video modes, the following options need to be enabled:
- Allow 50Hz
- Allow 24Hz
- Allow YCC 4:2:2
- Allow 4K
- Allow HDR10
- Auto HDR

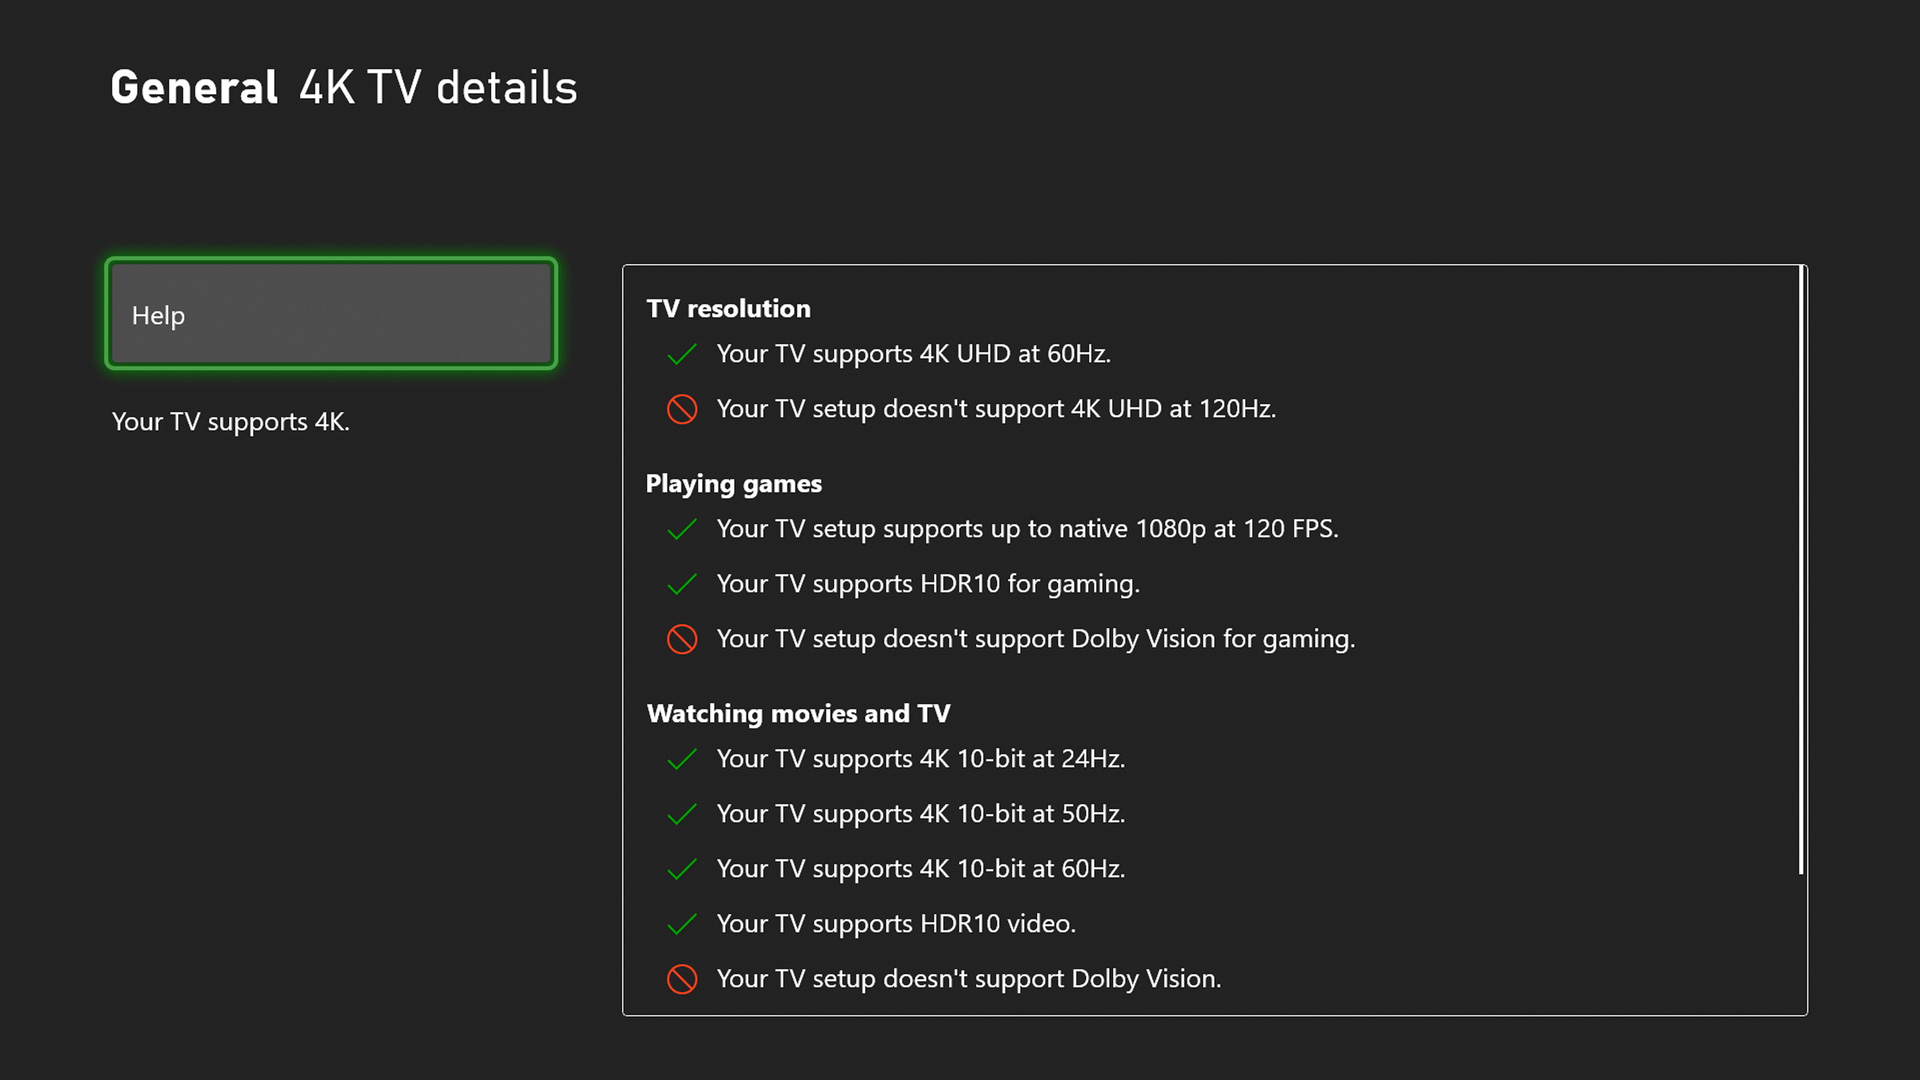
- Next, go into the 4K TV details overview to verify if all the previously selected settings apply correctly.
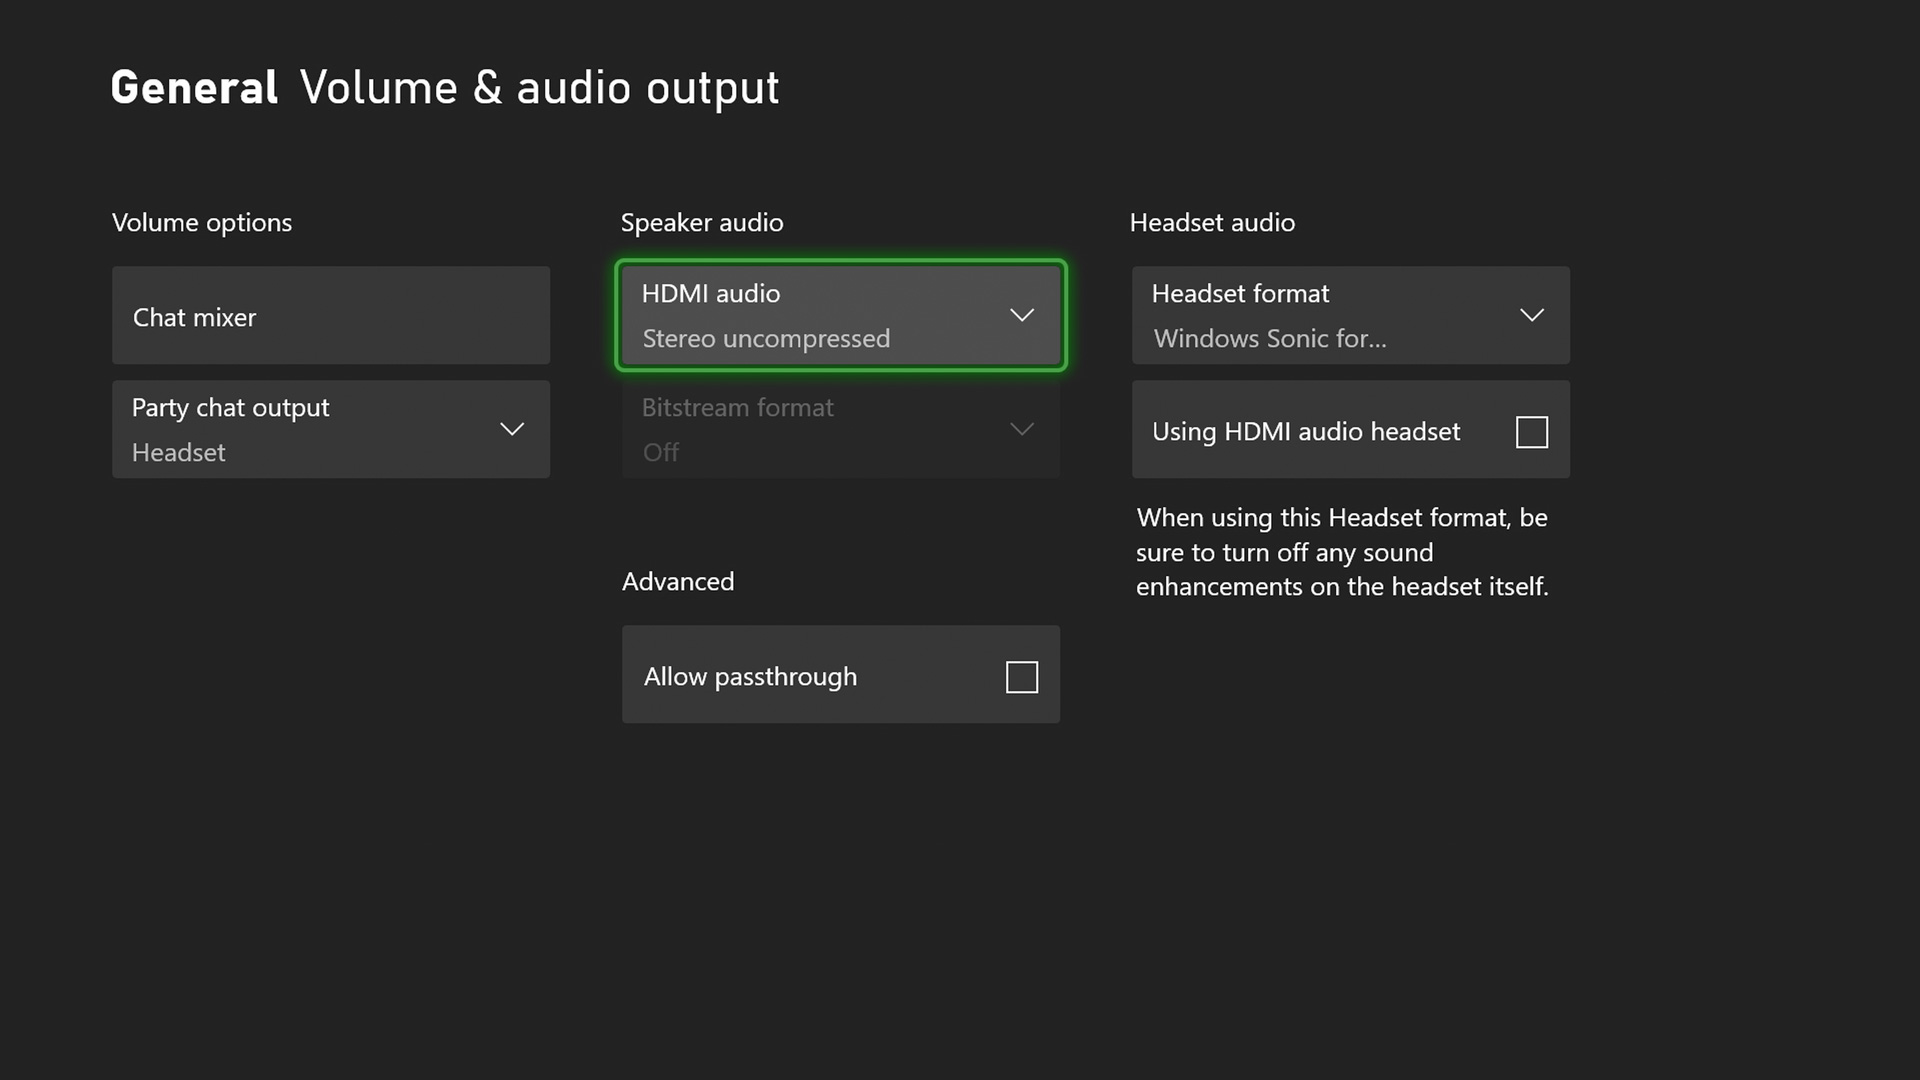
- To match the Ninja V's previously selected audio recording settings, go into the Volume & audio output setting and set Speaker audio to Stereo uncompressed.
Troubleshooting hints
Due to the nature of the Auto HDR function, you can only record in HDR with the Ninja V if you start the recording while you're in an HDR game.
If the Xbox Series X sits in the main menu, it outputs a regular SDR video signal.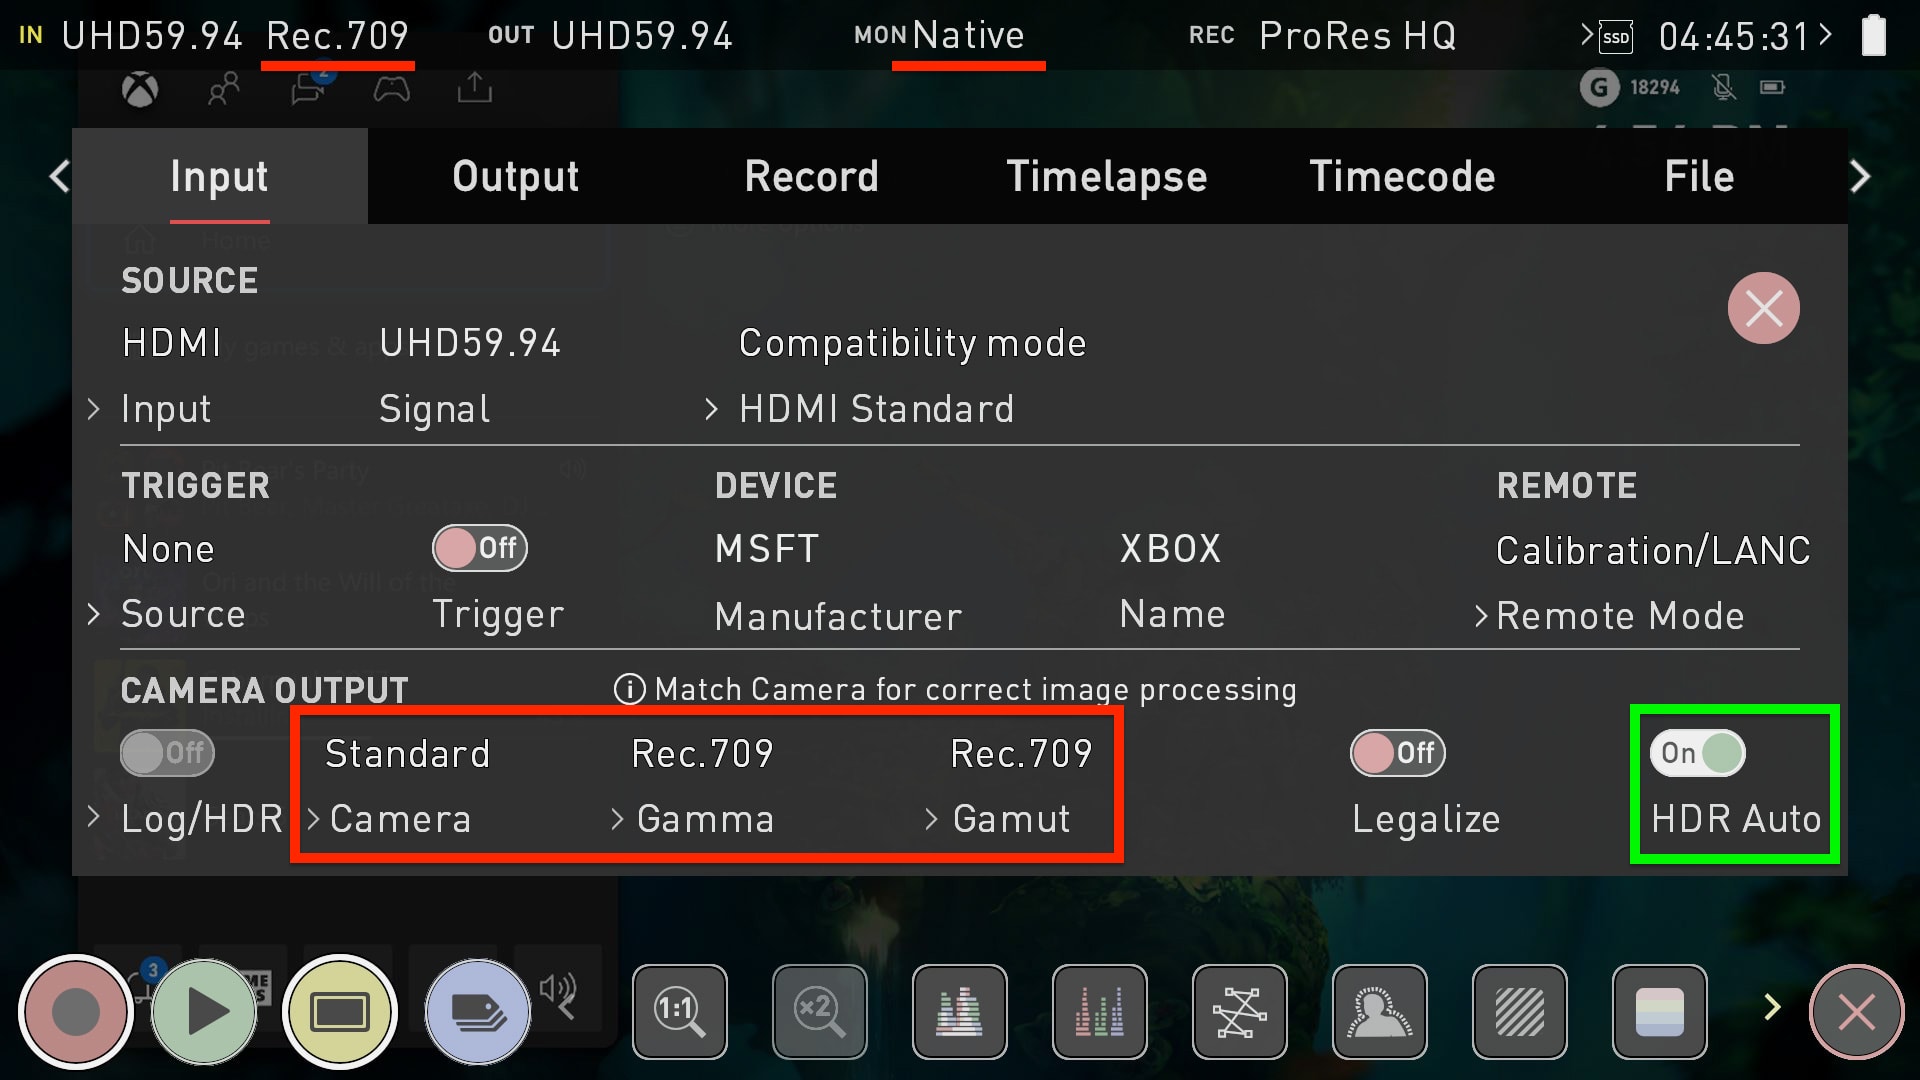
It only outputs an HDR signal, after launching an HDR game and the Ninja V will automatically detect that.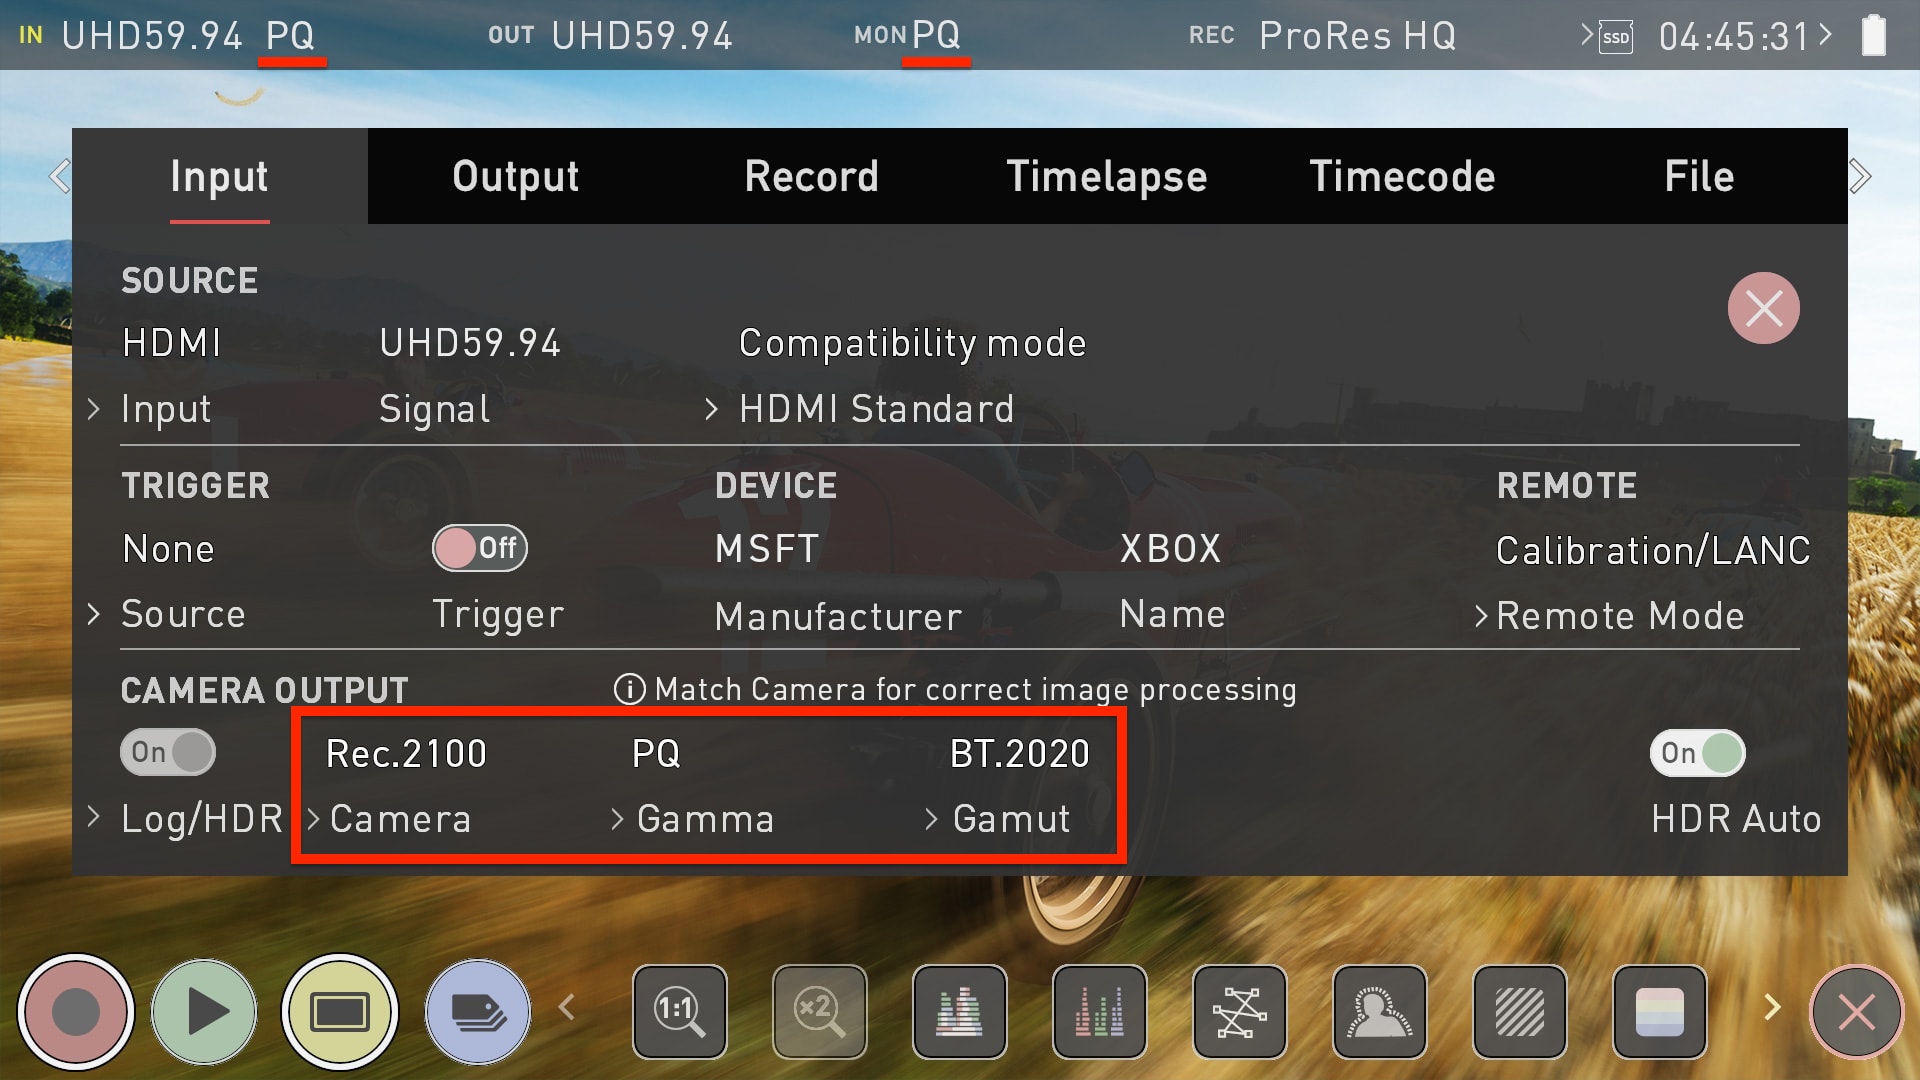
However, if you start recording while you're still in the Xbox main menu and then switch to the game, the Ninja V will keep the original SDR metadata. That's because it can't update the files' metadata if it has already started writing a single clip onto the SSD.
On HDCP: There is no way to disable HDPC on the Xbox Series X. However, HDCP will always be disabled during gameplay. Only if you launch an app that may play back HDCP protected content, the Xbox outputs a black screen, which is accompanied by a warning message.
These steps also apply to the Ninja V+, Shogun 7, Neon 17 & Neon 24.
Comments
0 comments
Article is closed for comments.