
The General Tab in the ZATO CONNECT's main menu includes four less frequently visited sub-menus. Power, Display, Date & Time, as well as About Device.
Power:
The Power section provides basic instructions on the multipurpose utilization of the ZATO's power button, as well as providing more information on the Battery & USB PD Status.
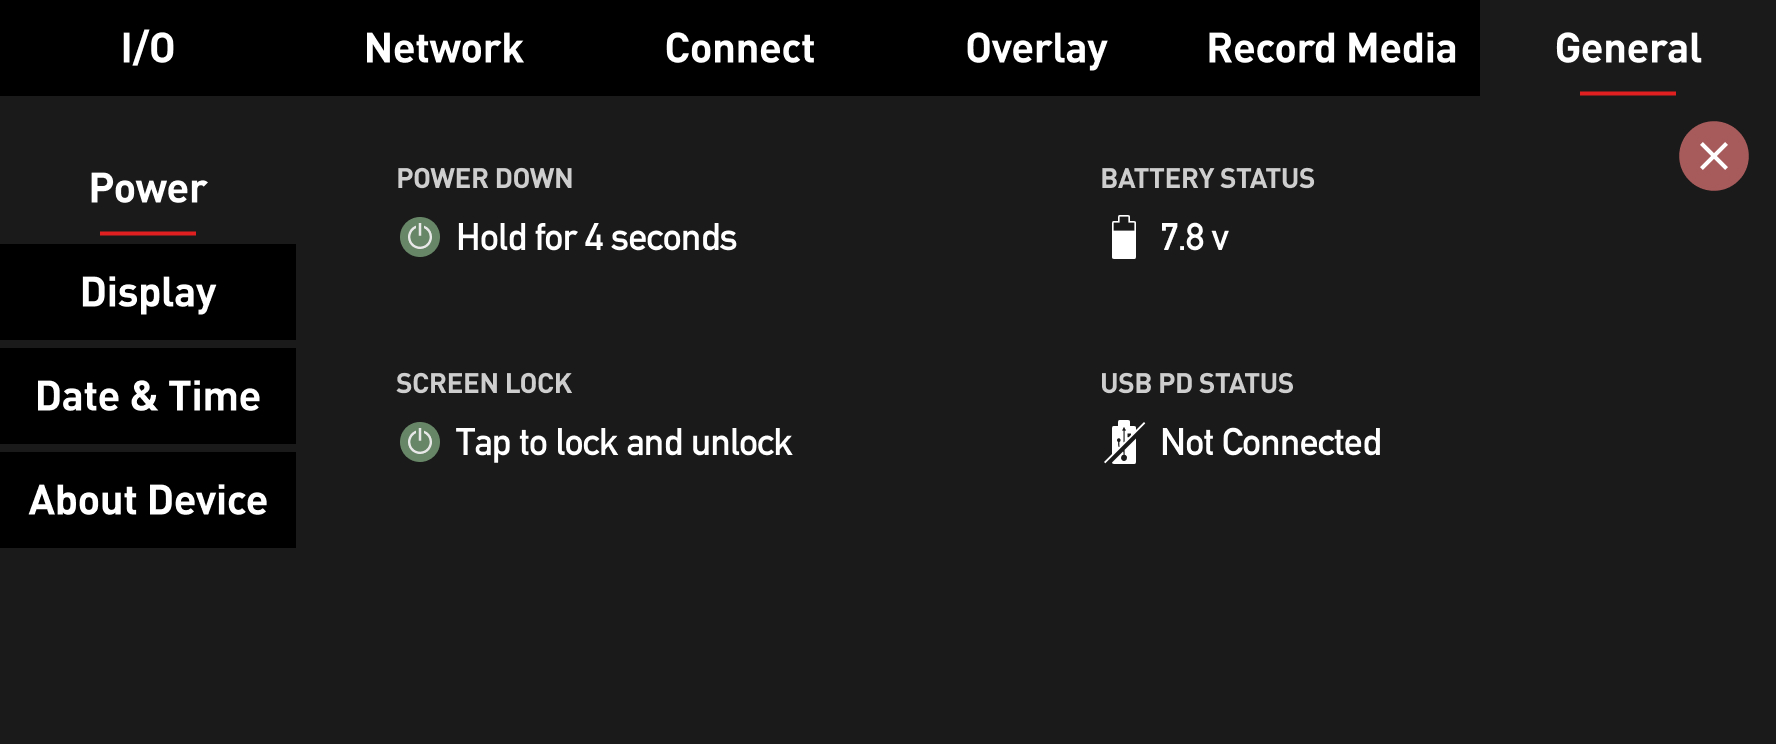
To power down the device, hold the power button for 4 seconds.
To engage the Screen Lock, shortly press the power button once. As the name suggests, engaging the Screen Lock blocks all touch screen interaction, making it impossible to accidentally change any device settings.
On the right side, there's a battery status indicator for NP-F/L-Series batteries that may be attached to the battery slot on the rear side of the unit.
If you power the ZATO via a NP-F/L-Series battery, the battery icon shows the Battery Status based on a voltage reading.
Right under the Battery Status, there's the USB PD Status display. If you power the ZATO via a USB PD power bank or power adapter, it will provide a voltage reading as well.
Note: If the voltage drops to 6.5V, the ZATO will display a warning message via a pop-up dialog, asking users to connect their device to mains power because the battery is reaching low charge levels. At 6.2V, there's one final warning that the ZATO might turn off momentarily because the attached battery is almost empty.

Note: If the ZATO is powered via USB PD only, the Battery Status up top will read "Not Connected". If it is exclusively powered via a NP-F/L-Series battery, the USB PD Status will read "Not Connected" instead.
Display:
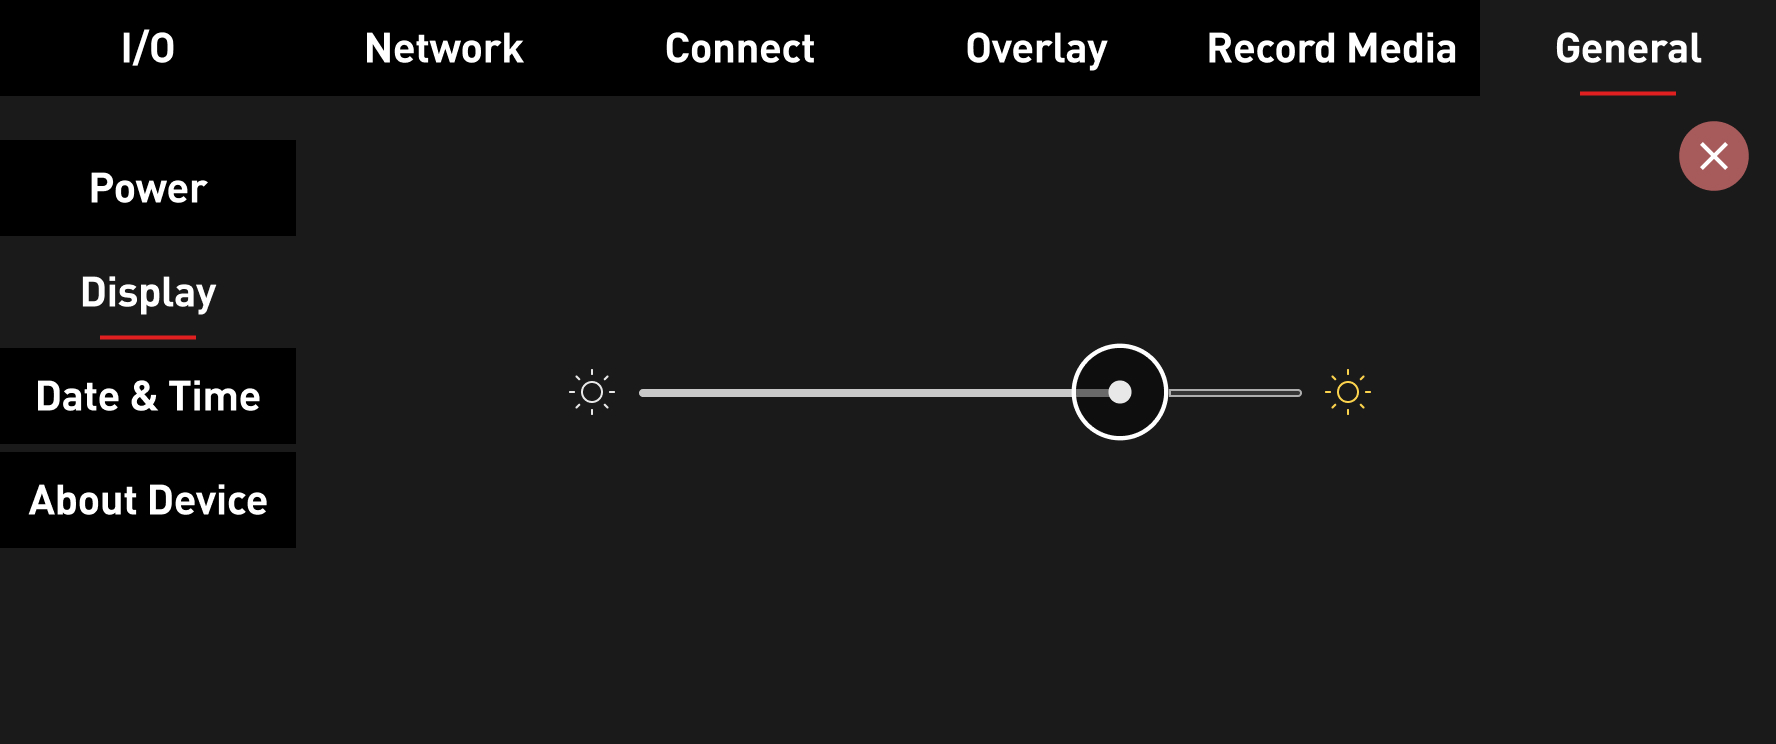
The Display menu only contains one large horizontal slider, allowing you to adjust the brightness/backlight strength of the ZATO CONNECT.
Date & Time:
In this menu, you can configure the ZATO's handling of the Date & Time.
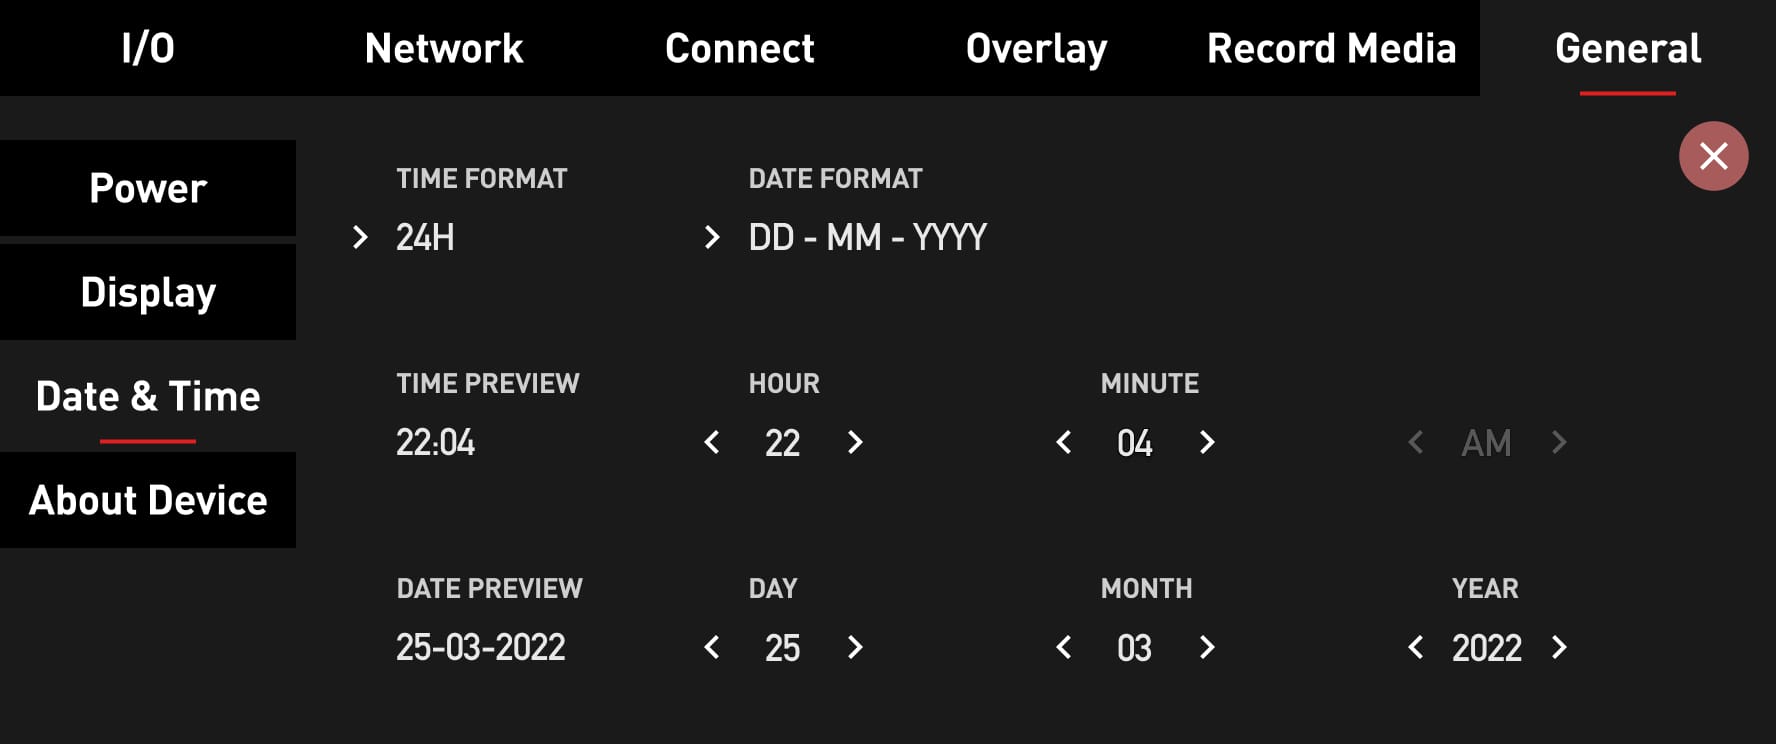
By pressing on Time Format, you can switch from 24H to 12H time. Under Date Format, you can change the way that the current date is displayed. Available formats are DD-MM-YYYY (default), MM-DD-YYYY, and YYYY-MM-DD.
Time Preview shows you the current time you've entered. You can make adjustments by modifying the Hour and Minute fields.
Date Preview highlights the current date that the ZATO is set to. You can adjust the Date by modifying the Day, Month, and Year fields.
Note: Once you've dialed in your Date & Time, the ZATO will keep it, even if you power off the device. The only ways the Date & Time might stop counting is if you reset your ZATO CONNECT, or if the internal battery runs out.
About Device:
The last sub-menu in the General tab highlights the Version number of the firmware that's currently installed on the ZATO CONNECT, the AID, and the firmware Build Info.
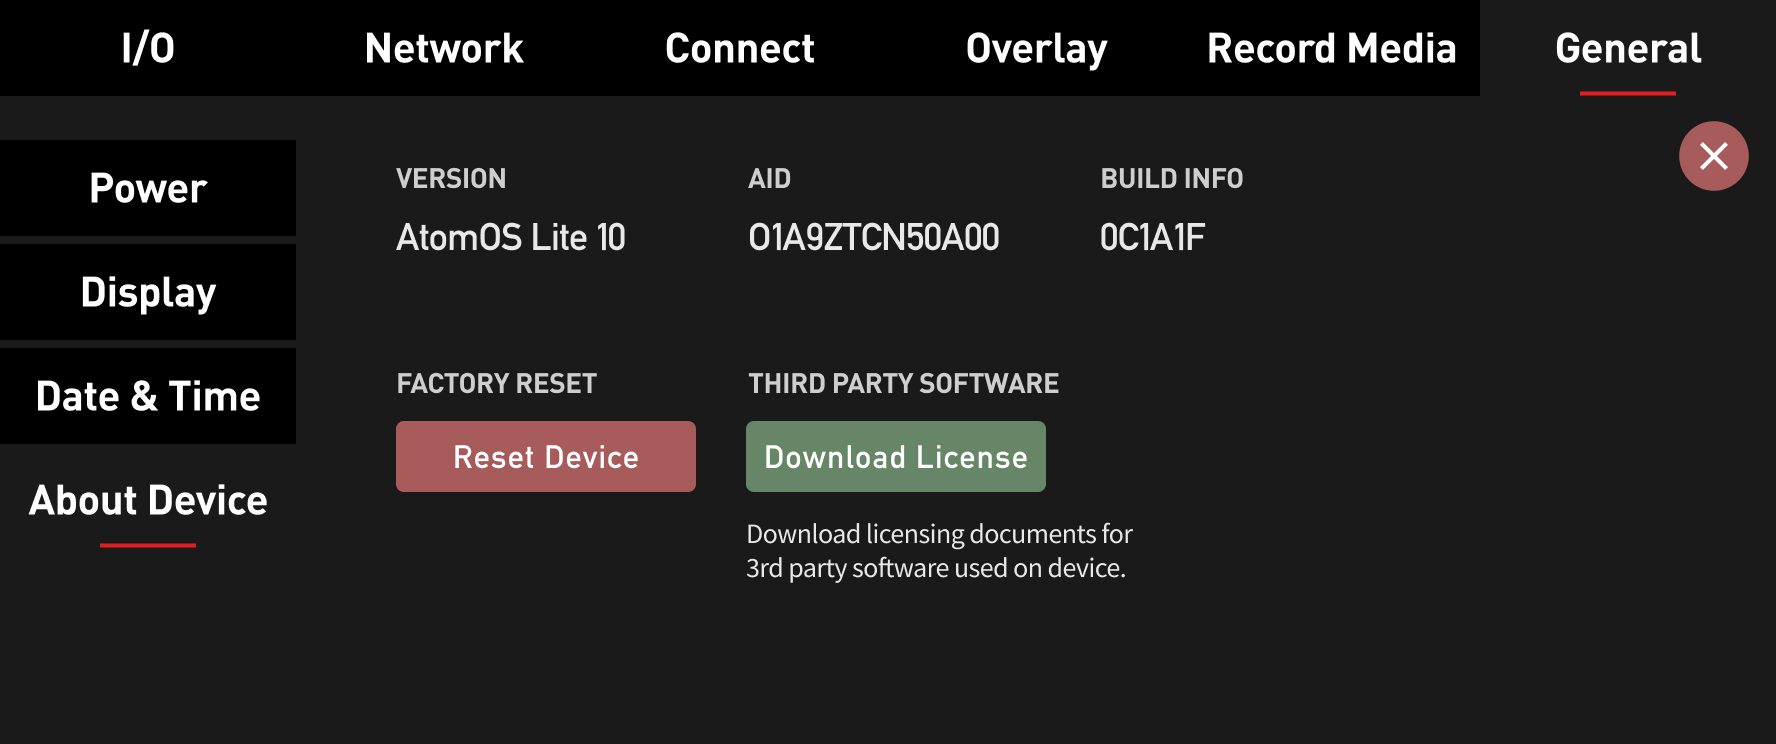
You'll also find the Reset Device button here, which resets the ZATO to its factory state. Pressing it and confirming the warning dialog removes everything previously configured on the ZATO CONNECT. This means that all WiFi & Ethernet Network configurations, Overlay Graphics and Presets, Atomos Cloud pairings, and so on will be gone.
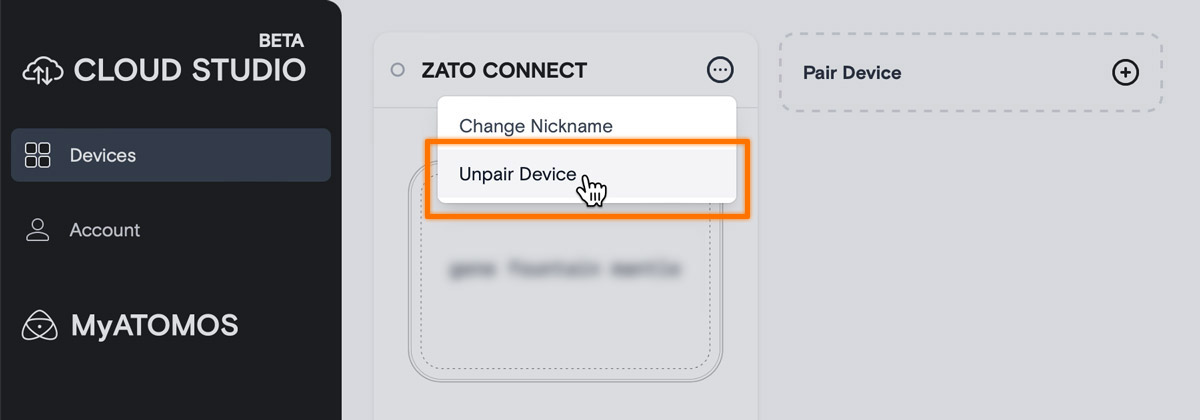
Important Note: Before you perform a reset, you will need to unpair your ZATO CONNECT from your Atomos Cloud Studio account (if you've previously paired it). To do this, log into your account via atomos.cloud, and click on the three dots in the top right corner of your device's entry. A dropdown menu will open, allowing you to unpair your device. Once you press unpair device, you will need to confirm your selection once more in another popup menu.
Pressing the Download License button creates a .TXT file on the SD card, including licenses for the 3rd party software libraries we use on the ZATO CONNECT.
Comments
0 comments
Article is closed for comments.